Using AI for Upscaling
As our screens get bigger and add more pixels, our old content stays the same. Grandma’s 8mm hand cranked film of her swinging in the tree starts to look pretty rough compared to the latest 8K footage of a tardigrade’s frosty breath in the deep arctic. Televisions aren’t the only thing that have improved - new and unique methods of image processing using artificial intelligence are starting to help bridge the gap between the old and the new. New monitors come with processing units that will upscale and modify content on the fly. In the video gaming world you have Nvidia with DLSS and AMD with FidelityFX both aiming to provide a real time “super-resolution” upscale.
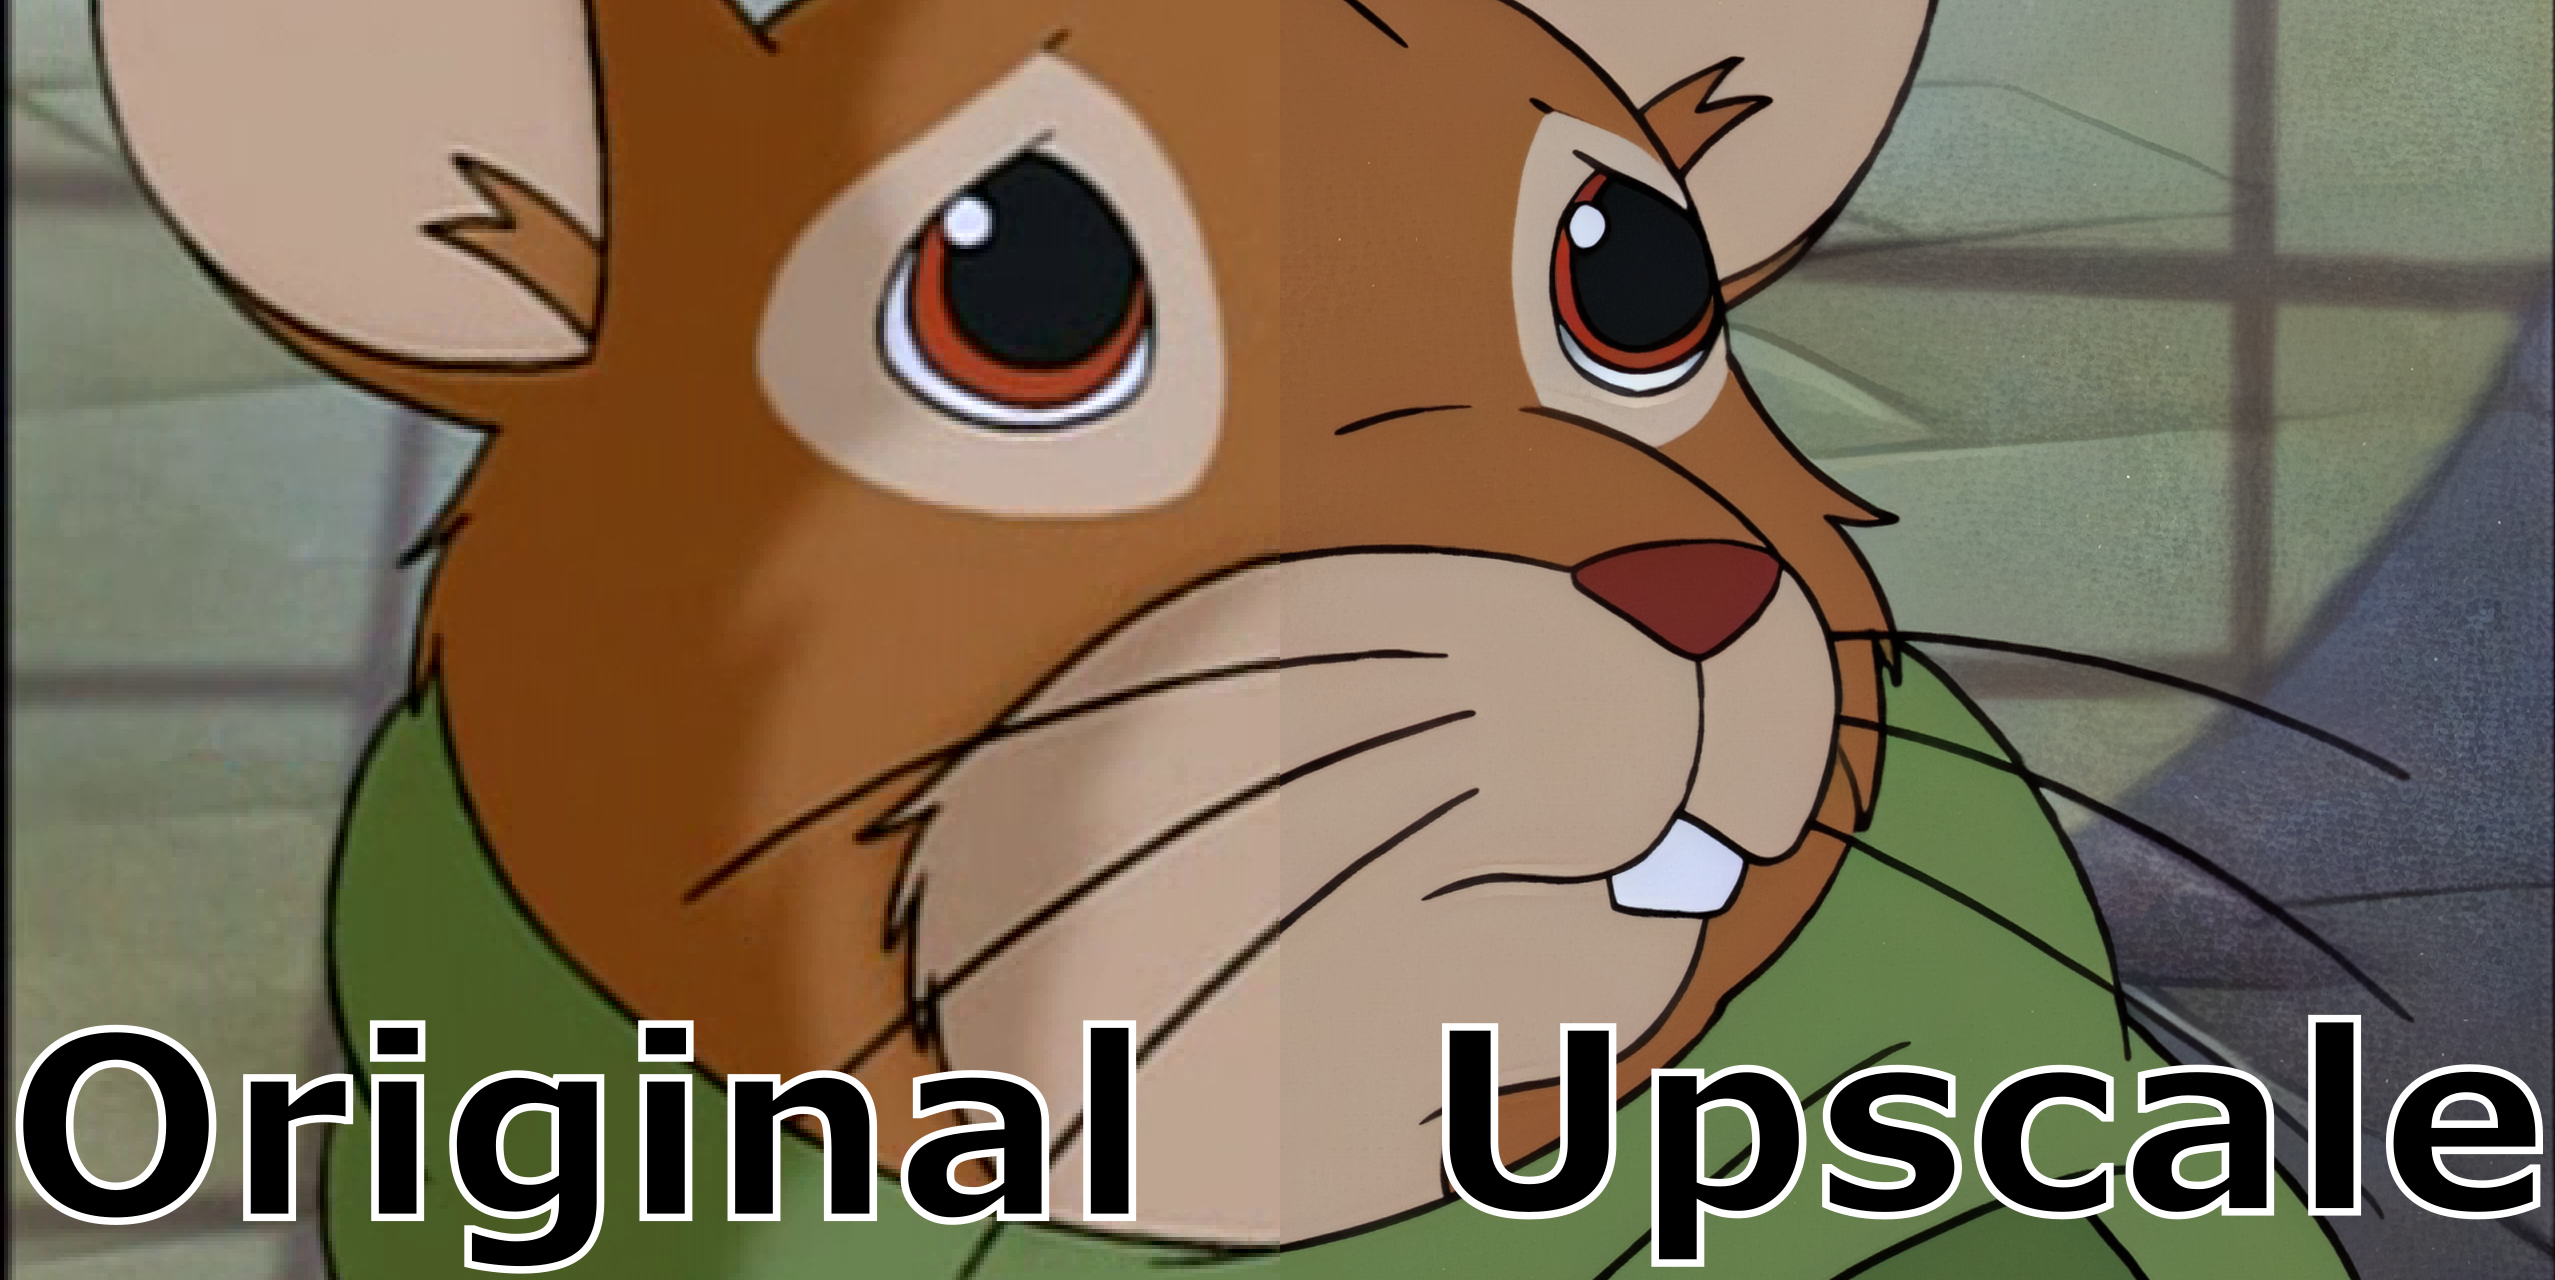
I was recently watching Redwall (a cartoon based on Brian Jacques’ book series) on my 4k television and was glaringly reminded that the show was originally produced for use over the air on a CRT television. I had seen some posts in the emulation community about a machine learning model for upscaling old video game textures, and video games are just interactive cartoons so it should work on old cartoons too… right? Let’s find out.
Before we jump right into coding, some historic backround on broadcast television is needed. Prior to the advent of our current digital world, TV was broadcast over radio signal. In order to optimize the bandwidth it would be interlaced or they would send half of one frame following by the other half, but it would sometimes result in a combing pattern on the frames like the example below.

TV would be broadcast in NTSC or PAL format. The US, Japan and others use NTSC and some places in Europe and others use PAL. One way you can tell is to check the framerate, 30 FPS for NTSC and 25 FPS for PAL. The TV’s would operate at 60hz or 50hz respectively. Now monitors can go up to 120hz or more.
My DVD source is encoded at 60 FPS or NTSC, however in reality it’s closer to 30 FPS with 2 fields that make up a frame, based on the combing I see during frame by frame playback.
Most cinematic films were created at a standard 24 FPS which as you might notice isn’t divisible by 30 or 60. A telecine method called a 3:2 pulldown would be used to generate enough frames to reflect the broadcast television frequency without causing too many jolting frames, which is roughly a conversion of every 4 frames into 5 frames.
Now that we have all the background information we need, I’m going to list out a rough overview of the considerations for the source content and then see what steps I need to take to ultimately upscale the series.
Original Source:
- NTSC (59.94 FPS)
- Interlacing: YES
- Dimension: 720x480
A few notes on the source and some of the math involved.
There are 3 aspect ratios:
- SAR: Storage Aspect Ratio
- DAR: Display Aspect Ratio
- PAR: Pixel Aspect Ratio
Here’s a basic equation for the dimensions:
SAR x PAR = DAR
or
PAR = DAR/SAR
So for my DVD source we have
SAR = 720/480 (or 704/480 if you want to crop out the 8 pixel buffer on either side, some refer to it as Nominal Analogue Blanking)
PAR = 10:11
DAR = 4:3
so logically if there are no buffers and the pixels are square 640x480 would yield our 4:3 aspect ratio, but since our PAR is 10:11 and we have an 8 pixel buffer then you effectively have:
(4/3) = (10/11)x(704/480)
(4/3) = (10x704)/(11x480)
(4/3) = 7040/5280
1.333 = 1.333
If we want our PAR to be one then we need to reduce the SAR to 640x480 or if you want to include the 8 pixel buffer you can increase it to 720x540
1 = (4/3)/ (640/480)
1 = (4/3)/ (720/540)
With the understanding of the broadcast to DVD formats, we can look at what we would want in the end to closer reflect the original cinematic scans.
Final Result:
- NTSC (23.976 (24/1.001) FPS)
- Interlacing: NO
- Dimension: 2880x2160
We will be de-interlacing the fields back into full frames. This has a similiar effect as an inverse telecine but it’s technically different which I will explain a little later. As you can see I want it to be back to the full 24 frames per second like the original scans, and since the goal is to upscale, I scaled up the dvd source to 720*540 which upscaled 4x is 2880x2160.
Upscale Process:
- Deinterlace (QTGMC)
- rescale to 720x540 (FFMPEG)
- Split video to frames (NMKD FF-Utils or FFMPEG)
- Upscale (ESRGAN/Cupscale)
- Combine frames to video (FFMPEG)
- merge audio and subs to combined frame video. (FFMPEG)
- create h.265 versions in the interest of saving space (FFMPEG)
Deinterlacing:
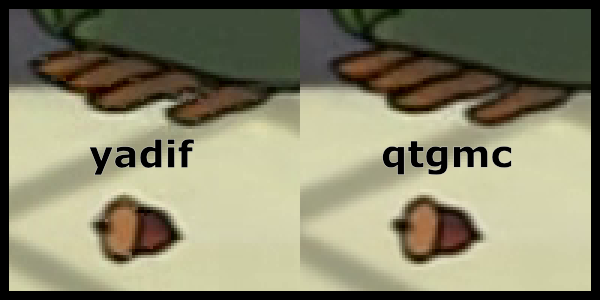
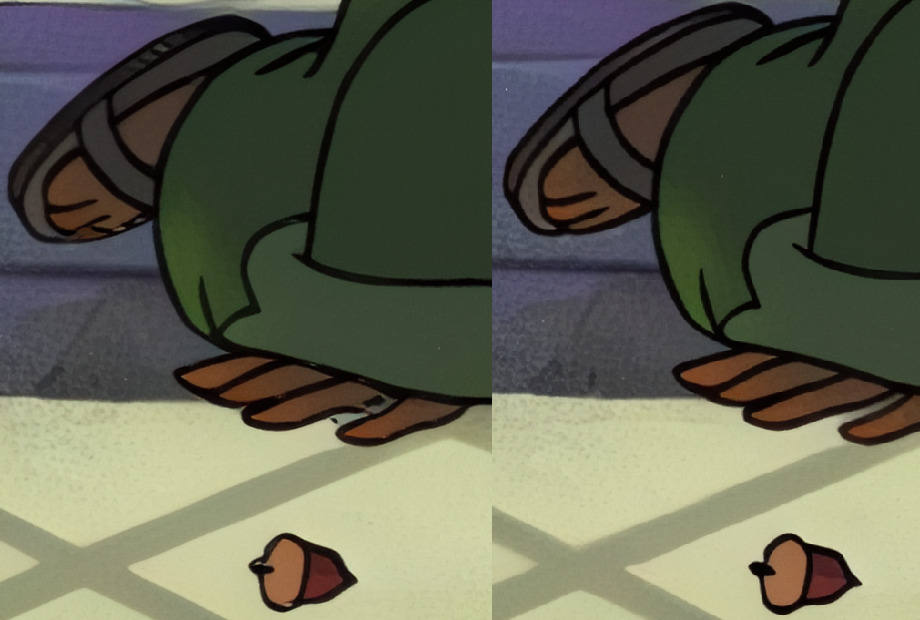
This source has interlacing and usually isn’t an issue as most modern playback software can handle deinterlacing on the fly, but when you upscale an interlaced source the interlacing becomes more pronounced and the automatic deinterlacing software becomes much less effective. There are a variety of ways to deinterlace, but I’m just going to detail 2 examples, FFMPEG’s yadif filter and Avisynth’s QTGMC. FFMPEG is the simplest option but QTGMC provides the best results as you can see below.
ffmpeg yadif example:
ffmpeg -i in.mkv -vf yadif=0 out.mkv
or a more detailed option
ffmpeg -i src.mkv -vf yadif=3:1,mcdeint=2:1 -c:a copy -c:v libx264 -preset ultrafast -qp 0 deinterlaced.mkv
In my case I want to scale and deinterlace at the same time and came up with something like this:
ffmpeg -i input.mkv -vf "yadif=0, fps=24/1.001, scale=720:540" -c:v libx264 -b:v 8M -c:a copy output.mkv
Avisynth QTGMC example:
    SetFilterMTMode ("QTGMC", 2)
    a=LWLibavAudioSource(source="original.mkv", stream_index=-1, cache=true, av_sync=true, rate=0, decoder="")
    v=LWLibavVideoSource("original.mkv")
    AudioDubEx(v,a)
    ConvertToYV12()
    AssumeTFF()
    QTGMC(preset="Slower", SubPel=2, Sourcematch=3, Lossless=2).assumefps(60000,1001)
    srestore(24000.0/1001.0)
    BilinearResize(720,540)
    Prefetch(10)
Avisynth isn’t what I would call user friendly, it was somewhat complicated to get working, but it yielded much better results with fewer artifacts. If you are interested this is the guide that I followed to install it.
Now this was strictly deinterlacing - one potentially more effective method would be to inverse-telecine the footage. As was discussed above with the 3:2 pulldown method, you just inverse the process and in theory arrive at the original 24 frames that were used to create the broadcast. This would be the ideal method to generate the least artifacting for optimal upscaling. It could also be combined with a deinterlacing filter after the inverse-telecine process in case there were some variable frame rates not accounted for.
As with most projects there are a million different ways to do things and I may pursue more of them in the future, but for now the QTGMC results are acceptable enough for me. No doubt a newer technology will come out soon enough.
Muxing tracks
For this particular file, it has a separate subtitle and audio track I want to mux for the final output so I used this:
ffmpeg -i 'deinterlace.mkv' -i 'original.mkv' -i 'subtitles.srt' -c copy -map 0:0 -map 1:3 -map 2:s:0 'originalmaster.mkv'
Splitting a video into frames:
Now that we’ve got a decent source encoded how we like it, we can split it out into frames. I’ve used both FFMPEG or the more user friendly NMKD FF-Utils
FFMPEG example:
ffmpeg -i input.mkv -r 1/1 $filename%03d.png
or
ffmpeg -i vid.mp4 -q:v 1 -pix_fmt yuv420p folder/%8d.png
NMKD FF-Utils
https://github.com/n00mkrad/ff-utils
just drag and drop in the extract frames from video tab
Upscaling frames with ESRGAN using Cupscale:
You’ll need a NVidia GPU with CUDA cores for this if you want any chance of this not melting your processor.
You can follow the guide here on installing the prerequisites for ESRGAN
I’m not going to go into great detail on the prep and installation as it changes frequently, but there are plenty of online resources for installation of a machine learning environment on windows.
Once you’ve got that all installed you’ll either need to train a model or easier, find a pre-trained model that tells ESRGAN what to do with the images you throw at it. I used one called DigitalFrames 2.5 but no doubt there will be even better training models in the future that will yield even better results.
Point cupscale to your training model and drag and drop your extracted images for upscale. Depending on the length of the source, the scale, and quality it can take quite a while. One episode took over 36 hours of processing, so this is my disclaimer that it’s your own fault if you melt your GPU in the process of doing this. If you don’t want to destroy your processor you can look into using something like Google Collab instead.
Putting it all together:
Once cupscale does it’s thing and your computer has had time to cool down, you can combine the images into a video and put the audio back together:
Combining the frames to video:
ffmpeg -r 24/1.001 -f image2 -s 2880x2160 -i "%08d-4x_DigitalFrames_2.5.png" -c:v libx264 -preset veryslow -crf 13 -pix_fmt yuv420p -profile:v high -level:v 4.1 -refs 4 -bf 3 output.mkv
Muxing upscale with original audio and subs:
ffmpeg -i 'upscaled.mkv' -i 'originalmaster.mkv' -c copy -map 0:0 -map 1:1 -map 1:s:0 'finalmaster.mkv'
Compressing to h.265
ffmpeg -i input.mkv -vf scale=1920:1080 -vcodec libx265 -crf 23 output.mkv
Conclusion
There are some limitations to my current workflow. The training model I’m using adds white specks that were originally part of the animation cels used to train the model. Another issue is that the process doesn’t have a temporal component or in other words the upscale doesn’t take into account the frames before and after the frame being upscaled and so it can add to the judder and artifacts generated because it isn’t intelligent enough to interpolate adjoining data. One major issue is how much processing power it requires. It can take over two days on my 3060TI to upscale the frames of a 20 minute video clip. It needs to be faster than that. Even with the existing limitations, overall I’m pleased with the results and will revisit it again in the future when there are new models and frameworks that address the current limitations.
Here’s a slider to compare a final frame